Posts

Showing posts from 2016

Scotty Sweater using a Thrift store sweater and Applique from etsy Inspi...

Image
I JUST REALLY FELL IN LOVE WITH THE SWEATER ON THE RIGHT HAND SIDE, BUT IT WAS NOT IN MY BUDGET. So I decided to create my own version which is the picture of me on the left. The first thing I did was look on etsy.com to find an applique of a scotty which I did find in this AMAZING SHOP  JU JU BEAN APPLIQUES Purchased it for $5 dollars THEN I went on over to my local thrift store to look for an off white soft comfy sweater which cost me $4 dollars. Waited paitently for my applique to come in the mail which took only about 3 or so days because by the time I knew it the beautiful applique was in my mail box ready to be sewn! Then of course I started sewing away down below is the video I created for you to view my steps of sewing. Disclaimer I am not a professional at sewing!  d d
December Daily Day 2 2016

Image
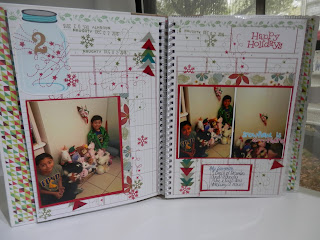
DECEMBER IS A GREAT TIME TO DOCUMENT SINCE SO MUCH IS GOING ON. I HAVE NOTICED THAT EVEN THOUGH I AM HAVING A CRAZY BUSY DAY I ALWAYS MAKE TIME TO ADD A LITTLE STORY IN MY DECEMBER DAILY ALBUM! WE CAUGHT THE ELVES WITH ALL OF MY DAUGHTER'S STUFFED ANILMALS ON THE FLOOR HERE IS A VIDEO PROCESS IF YOU CARE TO VIEW IN MOR DETAIL! THANK YOU SO MUCH!

Thrift Store Finds Sweaters

Image
Shopping at thrift stores is always such a rewarding feeling! Grey Sweater found for $6.99 This sweater looks a little plain but for only $3.99 I am going to add some leather elbow decor and make it look a bit more outdoorsy type of sweater This sweater also came out to $3.99 and I am going to add a pretty little dog patch on the front as I saw a sweater online I wanted that retailed for $150.00 I decided to buy the patch on etsy and sew it on myself saving loads of money! STAY TUNED TO SEE THE FINISHED SWEATER

DIY Stocking Stuffer Goodie Bags USING Dollar Tree GOODIES

Image
Hi you all so I have been trying to tackle my Christmas Gift List and one of the things I love doing is creating fun goodie bags for my kiddos for their Stockings! I decided to heas out to DOLLAR TREE and see if they carried some FUN Christmas goodies for them and I was super Happy with all the goodies I found! SUPPLIES I PURCHASED TO CREATE THESE GOODIE BAGS: -SNOWMEN BAGS SET OF 20 -SET OF 12 CT PENCILS Christmas Themed -Red Bows with bells set of 8 ct -Set of Erasers 20 ct These bags came out to under $1.00 each filled with so many goodies! DOWN BELOW IS MY VIDEO PROCESS ON HOW i CREATED THESE BAGS!

Dollar tree DEORATE 3 Floral vases under 12 dollars DIY

Image
I LOVE USING THE DOLLAR TREE WHEN IT COMES TO DECORATING ON A BUDGET! I CREATED THESE FLORAL VASES USING $12 WORTH OF FLOWERS FROM THE DOLLAR TREE AND MY OWN VASES! You can also use vases from the dollar tree and if you have a local THRIFT SHOP YOU CAN GO IN SEARCH FOR  FUN AND INEXPENSIVE VASES IN A THRIFT SHOP!! LINK TO MY VIDEO ON HOW I CREATED THESE VASES IS DOWN BELOW!

CHRISTMAS TAGS

Image
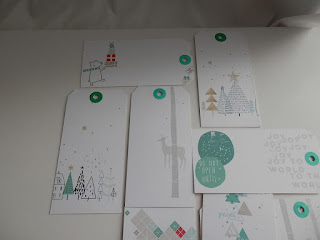
HI YOU ALL SO ITS THAT TIME AGAIN TO START CREATING SOME FUN TAGS FOR CHRISTMAS. I MADE A VIDEO TO SHO YOU HOW TO CREATE A QUICK AND SIMPLE TAG WHICH PROBABLY WILL ONLY TAKE YOU LESS THAN 5 MINTUES TO CREATE. YOU WILL NEED: *CHRISTMAS PAPER *ROUND STICKY TABS SCISSORS TAG BASE GLUE NOW THAT YOU HAVE YOUR SUPPLIES HERE IS A VIDEO TO SHOW YOU STEP BY STEP: https://www.youtube.com/watch?v=PVRjewY5nf0

Summer kids crafts Creating Washi tape Bookmarks

Image
HI YOU ALL! SUMMER CRAFTING WITH THE KIDS IS SOMETHING I look forward to every year! So we are kicking off are summer projects with a SIMPLE AND EASY TO DO WASHI TAPE AND STICKER BOOK MARK. SSUPPLIES NEEDED: -WASHI TAPE -HEAVY CARDSTOCK OR A VERY STURDY THICK PAPER -STICKERS FOR EXTRA CUTENESS -RIBBON -HOLE PUNCHER HERE IS HOW WE DID THESE BOOK MARKS AND OFCOURSE IF YOU PREFER VIEWING MY KIDDOS TUTORIAL ON HOW THEY MADE THEIR BOOK MARKS I WILL LEAVE THE VIDEO DOWN BELOW! 1. WE CUT A STIRP OF PAPER/HEAVY CARDSTOCK  2 1/2 INCHES WIDE BY 7 INCHES LONG OR YOU CHOOSE YOUR SIZE. 2. NEXT WE PLACED DIFFERENT PATTERENED WASHI TAPE ON THE CARD STOCK SINCE SOME WASHI IS EASY TO COME OFF WE PLACED A LITTLE BT OF GLUE ON THE CARDSTOCK THEN ADHERED THE WASHI TAPE. 3. THEN WE ADDED SOME STICKERS. DEPENDING ON YOUR KIDDOS AGE YOU CAN ADD STICKERS ONLY TO YOUR BOOK MARK. MY 3 YEAR OLD PREFERED STICKERS ON HIS BOOK MARK SO THATS WHAT WE DID, BUT MY 7 AND 9 YEAR OLD WERE

UpCycled Dresser using AMY HOWARD PAINT

Image
Hi you all so I was given this fantastic dresser by a good friend! I already had in mind where I wanted this dresser to be. So I went insearch for some Amy Howard Paint since I had just been seeing all of her videos on youtube and I was so sold on her paint. Well it turns out where I live the closest store and the only store that carried it here in Southern tip of Texas is at ACE BORDERLAND HARDWARE  IN WESLACO. The staff was so friendly and  helpfull it was Like I had walked into an old town where everyone knows your name! I loved the ambiance of the shop and will definetly go back! The first thing I did was completely sand down the dresser with n electric sander which I purchased at Harbor Freight for under $30 such a great investment it made the sanding process run smoothly and quickly! Next, I used my chocolate brown base paint and left some areas of the natural color un-touched so that the natural color would come out as well. After that set for most of the morning

Simple small cards using scrap paper Use your stash

Image
       

Artists Trading Cards are always fun to create

Image
  I had so much fun creating these ATC 's for a swap over  at                YOUR PAPER PANTRY. The challenge was to create the ATC using only faces no bodies, so I rembered I had these funky looking stickers.  I just used the colors on the sticker to mimic the background color 

Create centers for Flowers

Image
Hi you all so we have been doing so much over at Your Paper Pantry.  This months challenge  swap over in the flower section we will  be  creating centers for flowers using aupplies like pearls, bling and buttons.                Here I have created these centers using hot glue for the adhesive.  I will leave a link down below for you to see the tutorial THANKS FOR STOPPING BY!